 Material Move Command
- Step-By-Step
- Tips and Tricks
- Related Tools
1 . Pre-select a material to enable the Material contextual page and click the Material Move icon found in the Modify section. Skip step 2.
Alternative : Invoke Material Move using the Find Tool by searching the command name and clicking the Material Move icon, which is pictured above. Proceed to step 2.
Learn more about alternative methods for launching commands.
2 . Select (left-click) materials, bolts, and/or welds on one or more members.
▸ Right-click and select "OK" from the shortcut menu.
▸ Press the Enter key.
Alternative : You can press the Esc key or right-click and choose "Cancel" on the shortcut menu to end the command.
Note: If " Z filtering " is on when you complete the material selection, a Yes-No dialog opens asking the question: " Temporarily turn off Z filtering? " Press the " Yes " button to temporarily turn " Z filtering " off. " Z filtering " will be turned back on after the move operation is completed. Press the " No " button if you want the distance entered to " Z filtering " to apply to materials that are moved during this operation.
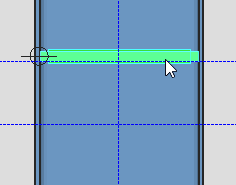
3 . The status line prompts, "Locate a reference point". Move the pointer ( ![]() ) to place the target (
) to place the target ( ![]() ), then left-click ( Locate ).
), then left-click ( Locate ).
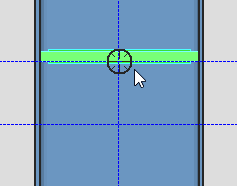
4 . The status line prompts, "Select member to move to".
▸ Select (left-click) a member to move the items to.
▸ Press the Enter key or the Esc key, or right-click and select "OK" from the context menu if you want the material(s) to remain on the same member(s) it is already located on.
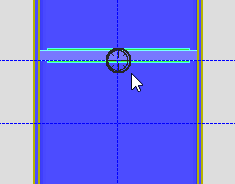
5 . The status line prompts, "Locate second point." Locate (left-click) the second point when the target ( ![]() ) is where you want the items moved in relation to the reference point.
) is where you want the items moved in relation to the reference point.

6 . The status line prompts "Verify new material location. "Yes - No" mouse bindings become active. The member and it's materials are temporarily shown in the "Solid Transparent" member style (if they are not already).
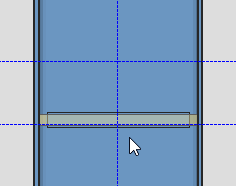
6a . Left-click ( Yes ) to confirm the move and end the command.
6b . Right-click ( No ) to back up to step 5 and locate a different second point.
- Global coordinates (materials, bolts and welds are moved with respect to)
- General Info window (alternative for moving)
- Rotate Material (alternative for moving)
- Move/Stretch Members (similar, but for members)
- Move/Stretch Members, Include Material

